| Oracle7 Workgroup Server for Windows NT Installation | Library |
Product |
| Oracle7 Workgroup Server for Windows NT Installation | Library |
Product |
Release 7.3.3
March 1997
Part No. A51570-01
If you want to install Oracle7 server software on a Windows NT server, see the section "Installing Oracle7 Workgroup Server Software on Windows NT". If you want to install Oracle7 client software on a Windows 95 or Windows 3.1 client, see the section "Installing Oracle7 Client Software on Windows 95 and Windows 3.1".
Upgrade from a Previous Release of Oracle7 Workgroup Server
If you are upgrading Oracle7 Workgroup Server from a previous release of Oracle7 Workgroup Server, for example, upgrading from release 7.3.2.2.0 to release 7.3.3.0.0, follow the instructions in the section "Upgrading Tasks".
Re-installing Oracle7 Workgroup Server
The Oracle Installer detects previous Oracle7 Workgroup Server installations. Oracle Installer attempts to use the same volumes, company name, and language when re-installing Oracle7 Workgroup Server for Windows NT. You can accept the default information provided by the Oracle Installer or provide new information. Co-existence of Different Versions of Oracle7 Workgroup Server
Two versions of Oracle7 Workgroup Server for Windows NT cannot co-exist if they are of the same major version. For example, Oracle7 Workgroup Server release 7.3.2.0.0 and Oracle7 Workgroup Server release 7.3.3.0.0 cannot co-exist. Like versions cannot co-exist because they depend on common files; one overwrites the other. If the servers are of different major versions (for example, one version 7.1 and another version 7.2), then they can co-exist. About the Oracle Installer
The Oracle Installer for Windows NT is a Graphical User Interface (GUI) that lets you quickly install, update and remove Oracle7 products. Three versions of the Oracle Installer are available on the Oracle7 Workgroup Server for Windows NT CD-ROM disc.
| Oracle Installer for... | Installs Oracle7 Products for... |
| Windows NT client and server | Windows NT |
| Windows 95 client | Windows 95 |
| Windows 3.1 client | Windows 3.1 |
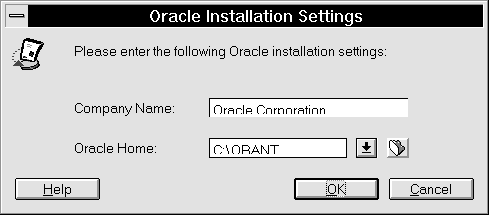
Oracle Home Directory
When you install the Oracle7 Workgroup Server for Windows NT, a top-level directory called Oracle Home is created on your hard disk. By default, the Oracle Home directory for:
|
|
Multiple Oracle Home support allows you to:
|
|
Check Software Requirements
Oracle7 Workgroup Server requires the software in the following table.
|
|
Check OCSM Installation Requirements
System Requirements
You must have the required Oracle Client Software Manager (OCSM) hardware and software in addition to the hardware and software requirements of the products you intend to install. Hardware Requirements
OCSM requires the hardware described in the following table:
Software Requirements
OCSM requires the software described in the following table:
|
|
|
|
Oracle7 Products
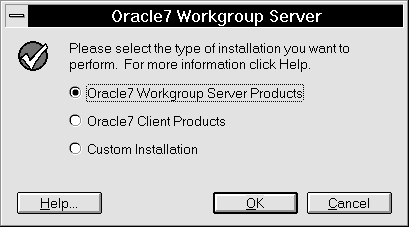
When you run Oracle Installer the Oracle7 Workgroup Server dialog box appears with various product installation options depending on the operating system you use.
| Operating System | Installation Options |
|
Windows NT
|
Oracle7 Workgroup Server Products
|
|
Windows 95 and Windows 3.1
|
Oracle7 Client Products
|
|
|
Oracle7 Workgroup Server Products
Oracle7 Workgroup Server products include a starter database, applications, utilities, and network products that enable client connections.
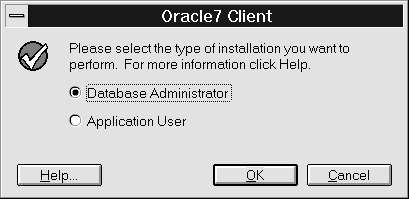
Oracle7 Client Products
Oracle7 Client products include applications, utilities and network products used on the client side to access and manipulate databases on the server.
Custom Installation
The Custom Installation option lets you selectively install or remove Oracle products. The products available for installation are displayed on the left side of the Software Asset Manager screen.

Installing Oracle7 Workgroup Server Software on Windows NT
|
|
|
|
|
|
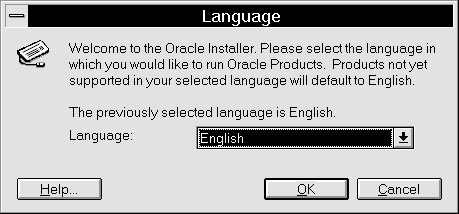
The Language dialog box appears.
Oracle7 Client Products
If you select the Oracle7 Client Products option, the Oracle7 Client dialog box appears.
|
|
The Language dialog box appears.
|
|
|
|
|
|
The upgrading process consists of the following tasks:
select sum(bytes) from sys.dba_free_spaceIf 8 MB of free space is not available, enlarge the SYSTEM tablespace.
where tablespace_name = 'SYSTEM';
alter tablespace SYSTEM add datafile 'directory for the file\filename' size 8M;
connect system/account password for the instancewhere the WHERE clause equals CONTROL_FILES, DB_FILES or LOG_FILES.
spool upgrade.log;
select member from v$logfile;
select name from v$datafile;
select value from v$parameter
where name = 'control_files';
connect internal/password
shutdown
exit
- ORASRV for version 7.0
net stop OracleServiceSIDThis command stops and deletes the service where SID is the sid of the instance.
oradim72 -delete -sid SID
|
|
|
|
|
|
|
|
|
|
ORADIM73 -NEW -SID sid [-INTPWD internal_pwd]
[-MAXUSERS number][-STARTMODE auto, manual]
[-PFILE INITsid.ORA]The following are created:
- Oracle service (OracleServicesid)
ORADIM73 -STARTUP -SID sid -PFILE INITsid.ORA [-USRPWD user_pwd] -STARTTYPE SRVC,INST
|
|
|
|
|
|
| Move Database Files From... | To... |
|
%ORACLE_HOME%\RDBMS70
|
%ORACLE_HOME%\DATABASE
|
|
%ORACLE_HOME%\RDBMS71
|
%ORACLE_HOME%\DATABASE
|
move c:\orant\rdbms71\ctl1orcl.ora c:\orant\database\ctl1abcd.ora.
| Move Archive Files From... | To... |
|
%ORACLE_HOME%\RDBMS70\ ARCHIVE
|
%ORACLE_HOME%\DATABASE\ARCHIVE
|
|
%ORACLE_HOME%\RDBMS71\ ARCHIVE
|
%ORACLE_HOME%\DATABASE\ARCHIVE
|
|
|
Move Initialization Files From...
To...
%ORACLE_HOME%\RDBMS70\ INITsid.ORA
%ORACLE_HOME%\DATABASE\ INITsid.ORA
%ORACLE_HOME%\RDBMS71\ INITsid.ORA
%ORACLE_HOME%\DATABASE\ INITsid.ORA
CONTROL_FILES = (%ORACLE_HOME%\DATABASE\CTL1ABCD.ORA)
|
|
|
|
SVRMGR> CONNECT INTERNAL/PASSWORD
SVRMGR> STARTUP EXCLUSIVE MOUNT
|
|
SVRMGR> ALTER DATABASE RENAME FILEThe following example 7.1 statements upgrade the default SID ORCL. Your statement must match your actual files.
2> C:\ORANT\RDBMS70\dbs1.ora',
3> C:\ORANT\RDBMS70\log1.ora',
4> C:\ORANT\RDBMS70\log2.ora' to
5> C:\ORANT\DATABASE\dbs1orcl.ora',
6> C:\ORANT\DATABASE\log1orcl.ora',
7> C:\ORANT\DATABASE\log2orcl.ora'
SVRMGR> ALTER DATABASE RENAME FILE
2> C:\ORANT\RDBMS71\log1orcl.ora',
3> C:\ORANT\RDBMS71\ARCHIVE\ log1orcl.ora',
4> C:\ORANT\RDBMS71\log2orcl.ora',
5> C:\ORANT\RDBMS71\ARCHIVE\ log2orcl.ora',
6> C:\ORANT\RDBMS71\sysorcl.ora',
7> C:\ORANT\RDBMS71\usrorcl.ora',
8> C:\ORANT\RDBMS71\rbsorcl.ora',
9> C:\ORANT\RDBMS71\tmporcl.ora' to
10> C:\ORANT\DATABASE\log1orcl.ora',
11> C:\ORANT\DATABASE\ARCHIVE\ log1orcl.ora',
12> C:\ORANT\DATABASE\log2orcl.ora',
13> C:\ORANT\DATABASE\ARCHIVE\ log2orcl.ora',
14> C:\ORANT\DATABASE\sys1orcl.ora',
15> C:\ORANT\DATABASE\usr1orcl.ora',
16> C:\ORANT\DATABASE\rbs1orcl.ora',
17> C:\ORANT\DATABASE\tmp1orcl.ora'
|
|
|
|
SVRMGR> ALTER DATABASE OPEN;To Upgrade From 7.1.3 to 7.3.3:
SVRMGR> @%RDBMS73%\ADMIN\CAT70101.SQL
SVRMGR> @%RDBMS73%\ADMIN\CAT70102.SQL
SVRMGR> @%RDBMS73%\ADMIN\CAT70103.SQL
SVRMGR> @%RDBMS73%\ADMIN\CAT7103.SQL
SVRMGR> @%RDBMS73%\ADMIN\CAT7106.SQL
SVRMGR> @%RDBMS73%\ADMIN\CAT7201.SQL
SVRMGR> @%RDBMS73%\ADMIN\CAT7202.SQL
SVRMGR> @%RDBMS73%\ADMIN\CAT7203.SQL
SVRMGR> @%RDBMS73%\ADMIN\CAT7301.SQL
SVRMGR> @%RDBMS73%\ADMIN\CAT7302.SQL
SVRMGR> @%RDBMS73%\ADMIN\CAT7303.SQL
SVRMGR> @%RDBMS73%\ADMIN\CATALOG.SQL
SVRMGR> @%RDBMS73%\ADMIN\CATPROC.SQL
SVRMGR> ALTER DATABASE OPEN;To Upgrade From 7.2.2 to 7.3.3:
SVRMGR> @%RDBMS73%\ADMIN\CAT7106.SQL
SVRMGR> @%RDBMS73%\ADMIN\CAT7201.SQL
SVRMGR> @%RDBMS73%\ADMIN\CAT7202.SQL
SVRMGR> @%RDBMS73%\ADMIN\CAT7203.SQL
SVRMGR> @%RDBMS73%\ADMIN\CAT7301.SQL
SVRMGR> @%RDBMS73%\ADMIN\CAT7302.SQL
SVRMGR> @%RDBMS73%\ADMIN\CAT7303.SQL
SVRMGR> @%RDBMS73%\ADMIN\CATALOG.SQL
SVRMGR> @%RDBMS73%\ADMIN\CATPROC.SQL
SVRMGR> ALTER DATABASE OPEN;
SVRMGR> @%RDBMS73%\ADMIN\CAT7203.SQL
SVRMGR> @%RDBMS73%\ADMIN\CAT7301.SQL
SVRMGR> @%RDBMS73%\ADMIN\CAT7302.SQL
SVRMGR> @%RDBMS73%\ADMIN\CAT7303.SQL
SVRMGR> @%RDBMS73%\ADMIN\CATALOG.SQL
SVRMGR> @%RDBMS73%\ADMIN\CATPROC.SQL
|
|
|
|
SVRMGR> shutdown
Copyright © 1996 Oracle Corporation. All Rights Reserved. |
Library |
Product |